General Design Process and Philosophy (Part 3)

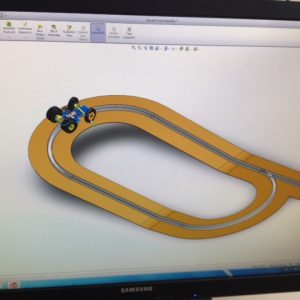
Once we knew what we wanted to do, all that was left was to do it! This was not a quick process however. We discovered that knowing what we wanted to do and knowing exactly how to go about doing it were quite different things. There was a lot of Googling involved. Thankfully, most of our design tools were popular and well documented, specifically Solid Works for the mechanical aspect and Arduino for the electronic and programming side of things. We also drew heavily on our previous experience, pulling ideas and skills from seemingly unrelated previous projects. During the early stages, there was not much programming as we focused more on building a basic test rig, even if it lacked sophisticated sensors and data communication. As such, Solid Works was used a lot. We would design the different components separately and then use CAD to see how it fit it within the larger assembly. There were many iterations to get it all right but eventually we completed it. Once we were satisfied with our CAD drawings, we took it to the workshop and had it produced.


General Design Process and Philosophy (Part 2)

After listing down our design considerations, we could move on to more specific designs. Concept level design decisions were made using decision trees. Here’s a specific example. We knew that as a truck, our test rig would have to have some form of driving. So we brainstormed the various options available: electric motor, heat engine, etc. We then qualitatively assessed each of these options again the design considerations we had. Based on this, a decision was made that impacted the next step in the decision tree. In this case, we decided to go with the electric motor option and then had to consider how to power it: battery, charged track, etc. We would go back to the assessment stage and keep carrying out this process till we reached the end of the tree, a very specific decision that could not really be debated on. We kept records of these trees in case we ever needed to back track at a later stage.

General Design Process and Philosophy (Part 1)

First and foremost, we had to list down the design considerations for this project. There were a few key areas that helped us narrow down our focus:

  • Functionality: The test rig had to have controlled failures which meant that parts that were not supposed to fail had to be over-engineered! Even if this meant choosing a slightly more expensive motor driver with excessive current sourcing capabilities, there was no competition if the closest rival could fail under normal test conditions.
  • Simplicity: We wanted the design to be simple enough so that even a 1st or 2nd year undergraduate student could understand, even contribute to, the project. To aid this, we also aimed to minimised the number of manufacturing processes undertaken so that a ‘standard’ student would be easily able to pick up what was going on. In keeping this simple, it helps to have fewer components. Therefore we aimed to have multi purpose components where possible. An example of this was using the Arduino platform as it is incredibly diverse and able to carry out many of the necessary functions. Finally, we also tried to keep components reasonably priced.
  • Awesomeness: While this might seem like an odd criteria, we recognised that what we were doing was useful and incredibly cool as well! We wanted to impress anyone who came into contact with this project. This is one of the reasons why we chose to model the truck after actual mining trucks, bright yellow and all!
  • Upgrades: The final factor we kept in mind was future expansions on the test rig. We wanted a rig that future team members could easily add to or change as necessary.